
 92
92
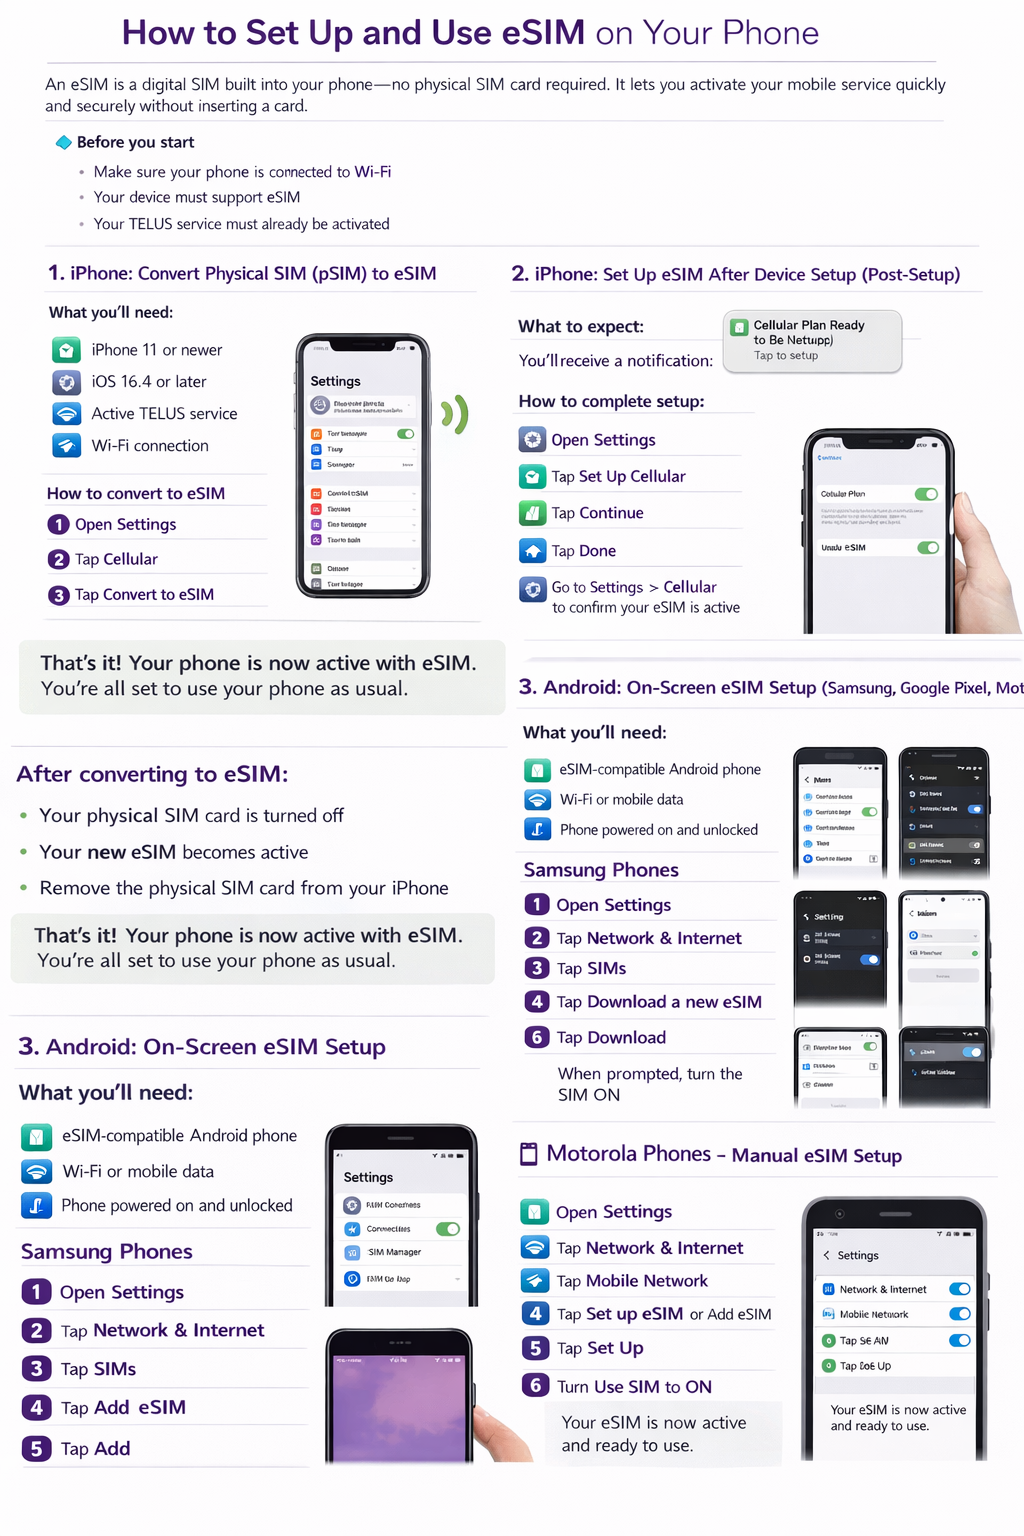
How to Set Up and Use eSIM on Your Phone
An eSIM is a digital SIM built into your phone—no physical SIM card required. It lets you activate your mobile service quickly and securely without inserting a card.
This guide covers:
-
Converting an iPhone from a physical SIM (pSIM) to an eSIM
-
Setting up an eSIM on an iPhone after the phone is already set up
-
Setting up an eSIM on supported Android devices
Before you start
-
Make sure your phone is connected to Wi-Fi
-
Your device must support eSIM
-
Your TELUS service must already be activated
1. iPhone: Convert Physical SIM (pSIM) to eSIM
If your iPhone currently uses a physical SIM card, you can convert it to an eSIM directly on your device.
What you’ll need
-
iPhone 11 or newer
-
iOS 16.4 or later
-
Active TELUS service
-
Wi-Fi connection
How to convert to eSIM
-
Open Settings
-
Tap Cellular
-
Tap Convert to eSIM
-
Tap Convert Cellular Plan
-
Double-click the side button to confirm
Your iPhone will convert your physical SIM to an eSIM automatically.
What happens next
-
Your physical SIM becomes inactive
-
Your new eSIM becomes active
-
You can safely remove the physical SIM card from your phone
2. iPhone: Set Up eSIM After Device Setup (Post-Setup)
If your iPhone was already set up before your eSIM was activated, you can complete the setup using on-screen prompts.
What to expect
After TELUS activates your eSIM, you’ll receive a notification on your iPhone prompting you to finish setup.
How to complete setup
-
Open Settings
-
Follow the prompt to Set Up Cellular
-
Tap Continue
-
Tap Done
-
Go to Settings > Cellular to confirm your eSIM is active
Your iPhone is now ready to use with eSIM.
3. Android: On-Screen eSIM Setup (Samsung, Google Pixel, Motorola)
Most Android phones will show an automatic notification when your eSIM is ready to be installed.
What you’ll need
-
eSIM-compatible Android phone
-
Wi-Fi or mobile data connection
-
Device unlocked and powered on
If you don’t see a notification, you can manually install the eSIM using the steps below.
Samsung Phones (Manual Setup)
-
Open Settings
-
Tap Connections
-
Tap SIM Manager
-
Tap Add eSIM
-
Tap Add
Your phone will download and activate the eSIM automatically.
Google Pixel Phones (Manual Setup)
-
Open Settings
-
Tap Network & Internet
-
Tap SIMs
-
Tap Download a new eSIM or Add SIM
-
Tap Download
-
When prompted, turn the SIM ON
Your Pixel will connect to the network once activation is complete.
Motorola Phones (Manual Setup)
-
Open Settings
-
Tap Network & Internet
-
Tap Mobile Network
-
Tap Set up eSIM or Add eSIM
-
Tap Set Up
-
Turn Use SIM ON when prompted
Your eSIM will activate and be ready to use.
Swap an eSIM Using Self-Serve (myTELUS)
Use the self-serve eSIM swap option if you need to change or replace your eSIM without transferring directly between devices.
When to Use This Option
Use self-serve eSIM swap if you want to:
-
Transfer your mobile service between different device types
(for example: iPhone to Android or Android to iPhone) -
Replace an eSIM for a lost device
-
Replace an eSIM that was accidentally deleted
Note: If you are transferring an eSIM between Apple devices, refer to the iPhone eSIM Quick Transfer section instead.
Before You Begin
Make sure you have:
-
Your device EID
(found in your phone’s Settings app) -
An active TELUS account
-
Owner or Manager access to the My TELUS account
How to Complete an eSIM Swap (Self-Serve)
-
Sign in to your myTELUS account.
-
Select Plans & Devices.
-
Choose Devices.
-
Scroll down to SIM Swap.
-
Follow the on-screen prompts and enter the required information (including your device EID).
-
Complete the swap and wait for activation.
Your new eSIM will activate once the process is complete.
For a step-by-step guide for each operating system, please use the link below:

